How to Stamp Bags: A Guide to Canvas, Paper, and Plastic
Custom-stamped bags are an easy, affordable way to add personality to packaging, gifts, events, and branding. Whether you're creating eco-friendly swag, boutique retail packaging, or DIY party favors, stamping gives you a handmade look with professional impact.
In this guide, we’ll walk through how to stamp canvas bags, paper bag surfaces, and even plastic bags, along with the best inks, techniques, and tips for clean, long-lasting stamp impressions.
Supplies You’ll Need
Taking a few minutes to prep your workspace can make the difference between a crisp, professional result and a smudged design. No matter what type of bag you’re stamping, start with these basic supplies:
- A custom rubber stamp
- Ink suited to your surface (fabric ink, archival ink, or specialty plastic ink)
- A flat, firm work surface
- Scrap paper or cardboard inserts
- Paper towels or scrap cloth for test prints
Stamping on Canvas Bags
Stamping on canvas bags is one of the most popular and durable methods for customizing tote bags, gift bags, and promotional items. Canvas is a textured fabric, so it requires a slightly different approach than smooth paper.
Pro Tips for Stamping on Canvas
Use fabric ink or fabric paint specifically designed for textiles. These specialty inks bond to fibers and withstand use and washing. When stamping on canvas, choose bold, simple designs, as fine details can get lost in the fabric's texture. Always test-stamp on scrap fabric first, and if your first print looks light, apply slightly more pressure rather than more ink.
Step-by-Step Instructions
Now that you’ve got your flat work surface, fabric paint, and custom stamp, it’s time to stamp your canvas bag.
- Pre-wash the bag (if possible) – New canvas bags sometimes have a coating or sizing that can interfere with ink absorption. Washing and drying help the ink adhere better.
- Insert a firm barrier –Place a piece of cardboard or thick paper inside the bag to provide a firm stamping surface and prevent ink from bleeding through.
- Load the stamp evenly – Tap the stamp gently onto the ink pad. Avoid pressing too hard; you want full coverage, not over-inking, which can blur details.
- Press straight down – Place the stamp where you want the design and apply firm, even pressure. Because canvas is textured, press slightly longer than you would on paper.
- Lift straight up – Don’t rock the stamp side to side, or you’ll smear the design.
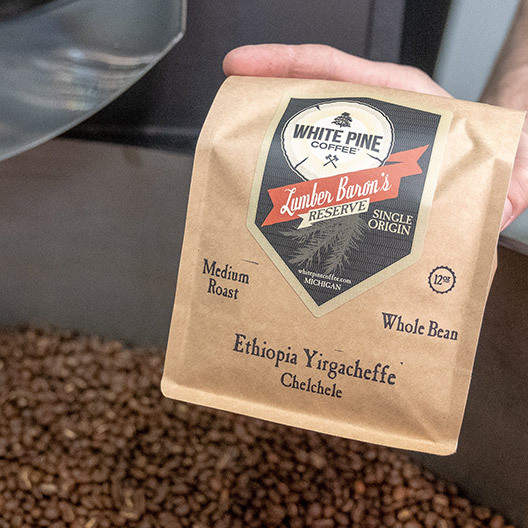
Stamping on Paper Bag Surfaces
Stamping on paper bag materials is quick, easy, and perfect for retail packaging, craft fairs, bakeries, and gift wrapping. A paper bag stamp is a cost-effective alternative to custom-printed packaging. Instead of ordering thousands of pre-printed bags, you can stamp smaller batches as needed. This affordable DIY method is perfect for small businesses, seasonal designs, limited-edition packaging, or event-specific branding. You can even change ink colors to match different themes or promotions without changing the stamp itself.
Pro Tips for Stamping on Paper
Use dye ink for fast-drying results or pigment ink for bolder, more opaque impressions on darker craft bags. Avoid stamping on paper bags in creased areas, as this can cause the ink to flake or crack. Consider the color of the bag you’re using to make sure the ink contrasts with the color. Paper bags come in different finishes, from smooth white to textured craft paper, and each affects your results slightly. Be sure to test in batches, especially if you switch paper bag types for your stamping projects.
Step-by-Step Instructions
Whether you’re making stamped paper bags for a small business or a fun craft project, here are step-by-step instructions to streamline the process and ensure your stamped paper bags look professional and cohesive.
- Flatten the bag surface – Insert a piece of cardboard into the bag to create a smooth, firm surface for stamping.
- Ink your stamp lightly and evenly –Paper absorbs ink quickly, so avoid overloading the stamp.
- Stamp with steady pressure – Press down evenly and hold for a second before lifting.
- Allow to dry completely –Even fast-drying inks need a little time to set, especially on coated or glossy paper bags.
Stamping Plastic Bags
Stamping plastic bags can be trickier than stamping paper or fabric, but it’s absolutely possible with the right materials. Plastic is non-porous, so standard inks smear or do not fully dry. The key is using ink specifically formulated to adhere to slick surfaces.
Pro Tips for Stamping on Plastic
Look for solvent-based or multi-surface archival inks designed for plastic, metal, glass, or glossy surfaces. Stamping on plastic can be trickier than canvas or paper, so always test first, as different plastics behave differently. When picking a workstation, avoid flexible areas that cause creases, as this can cause the ink to crack or flake. Keep in mind, plastic prints are more decorative than permanent, so your designs may not last as long as those on fabric or paper.
Step-by-Step Instructions
- Wipe the surface clean – Ensure the plastic bag is dry and free of dust or oil.
- Insert a firm backing –As with other bags, place cardboard inside to provide resistance when stamping.
- Ink the stamp lightly –Applying too much pressure increases the likelihood of the ink smearing.
- Stamp carefully and evenly –Press down firmly and evenly, then hold briefly to allow the ink to transfer.
- Let it dry undisturbed –Drying time is much longer on plastic–sometimes several hours. Avoid stacking your stamped bags or touching the printed area during this time.
Common Mistakes to Avoid
No matter the surface you’re working with for bag stamping, mistakes can happen. Avoiding these common issues will ensure the best results for your stamped bag project.
- Over-inking the stamp –Too much ink fills in fine details, causing blurry edges.
- Applying uneven pressure –Pressing harder on one side leads to partial prints.
- Skipping test prints –Every surface behaves differently. A quick test saves time and materials.
- Working without an insert –Always use a firm insert inside the bag to get a clean impression.
Choosing the Right Stamp Design
For bag projects, simple designs work best. Logos, bold text, icons, and line art translate well across canvas, paper, and even plastic. Very intricate or small details may not be visible clearly, especially when stamping canvas bags with textured fabric. If you're creating stamps for business use, consider multiple sizes of the same design for different bag types and layouts.
Stamping is a flexible and affordable way to customize bags for business or personal use. Whether you're stamping paper gift bags, creating branded totes by stamping canvas bags, or experimenting with plastic bags, a high-quality custom stamp paired with the right ink delivers perfect results at home, every time.