It’s no secret that weddings are expensive. Many couples know upfront that the venue, food, and entertainment are all major line items in the budget. But what about seemingly small details like stationery?
It turns out that wedding invitations and other paper products can be a major expense:
- According to Shutterfly, the average cost of wedding invitations is between $400-650.
- A survey by The Knot put the average total cost of all wedding stationery at $590.
- Experts for bride.com estimated a whopping budget of $5,000 to $8,000 for 100 invites.
These estimates predict you’ll spend hundreds of dollars on wedding invitations alone. But not everyone has or wants to spend that type of money.
If you want to cut costs but still produce a high-quality product, read our guide to DIY wedding invitations. We’ll walk you through every consideration for making your own wedding invites, from the design and quality of paper to personal (but inexpensive) touches like custom monograms and gold foil labels.
Step 1: Decide on Design
Your first step to DIY wedding invitations is to decide on a design, which will help dictate the type of paper, lettering, and any personal touches you may want to add. Websites like Etsy and Pinterest are great places to look for design inspiration.
Some designs may be more labor-intensive than others. Fortunately, there are some simple and inexpensive tools you can use, like rubber stamps or embossers, to add a personal touch to your stationery.
Step 2: Pick Your Paper
Once you’ve settled on a design you’ll want to pick the paper it's printed on.
Card stock is popular for its thicker (and therefore more luxurious) feel; brides.com recommends a 120 lb. uncoated cardstock with a linen or felt texture.
Other options like cotton fiber absorbs color extremely well but is more expensive, and thin materials like glassine or clear vellum paper can pose a challenge for DIYers.
The paper that works for you will ultimately depend on both your budget and the design you have in mind.
Step 3: Craft Your Content
When it comes to the content of their invitation, most DIYers choose to type out and print for uniformity, but hand lettering is always an option.
Techniques like letterpress and engraving will be off the table for DIYers without special equipment, but there are still ways to dress up your invitations and add a more sophisticated look.
Step 4: Add a Personal Touch
You don’t have to be artistically talented (or have a big budget) to make your own high-quality wedding invitations. There are a number of inexpensive and easy-to-use tools available to help elevate your design.
Using a custom monogram wedding stamp, for example, allows you to quickly and easily add a crisp design to your wedding invitations and envelopes. When choosing your stamp, you have the option of adding your information to an existing stamp design or uploading your own for a truly custom look.
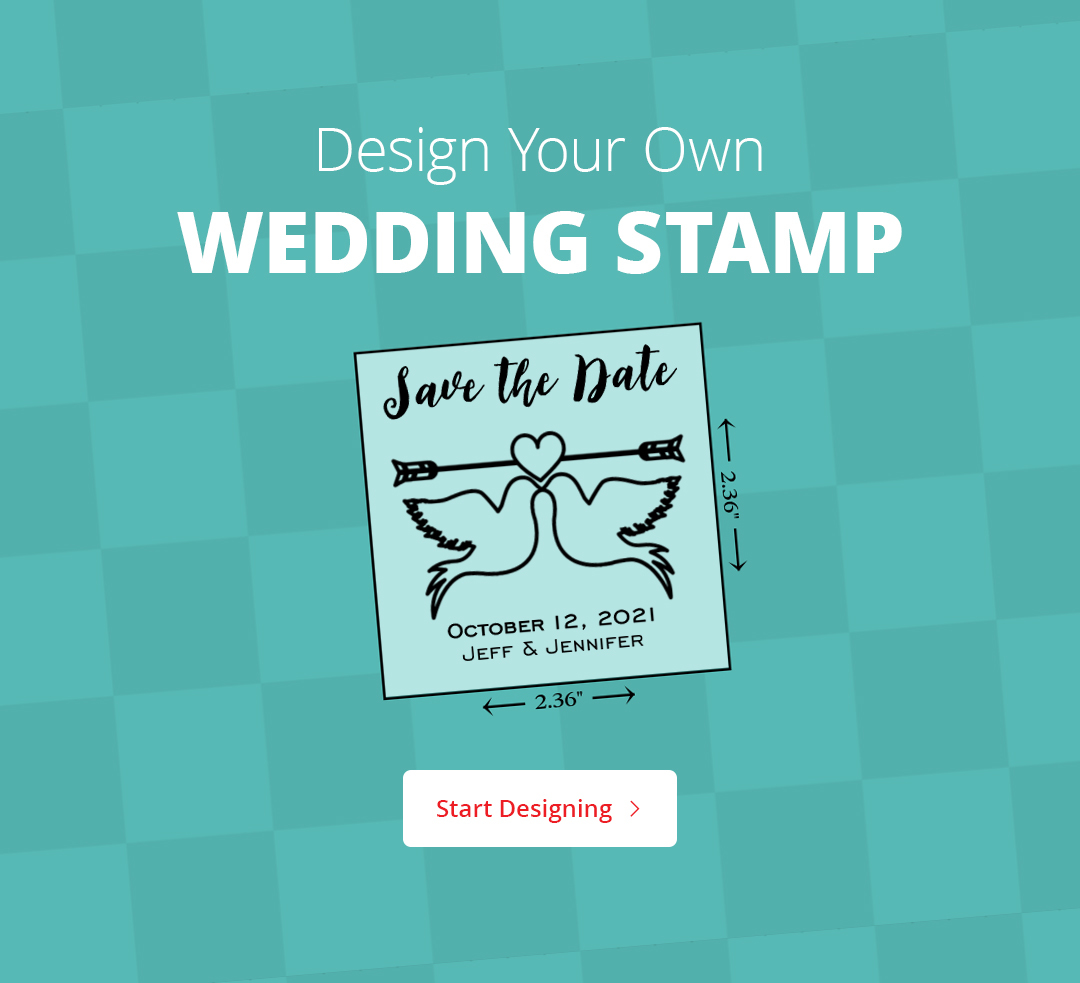
The stamp itself is also a consideration, and the best one for you will depend on the type of design you want. A self-inking or pre-inked stamp is great for efficiency, but a classic wood handle stamp gives you the option of changing ink colors and a greater range of sizes.
Another way to customize your DIY wedding invitation is to use a personalized embosser, which adds an embossed monogram to your stationery for a crisp and polished appearance. The end result looks expensive but can be done cheaply with your own embosser. You can even take it to the next level by using gold foil embossing labels to incorporate the popular (but pricey) trend of gold foil wedding invitations without blowing your budget.
Addressing Your Envelopes
After you’ve finished your DIY wedding invitations, it’s time to assemble your envelopes.
Online retailers like Paper Source carry envelopes in a variety of sizes, colors, and styles — a few online searches should give you an idea of what is available. When picking your envelope, consider the design and size of your wedding invitations to ensure that it is an appropriate fit. And if you’re in the United States, keep in mind that the United States Postal Service (USPS) has size requirements for letters. Invitations that fall outside these parameters will be charged extra postage.
You can hand address your envelopes or use a program like Excel to type out and print your mailing list onto address labels. Similar to the envelopes, these labels can be found in different designs and finishes, depending on where you look online.
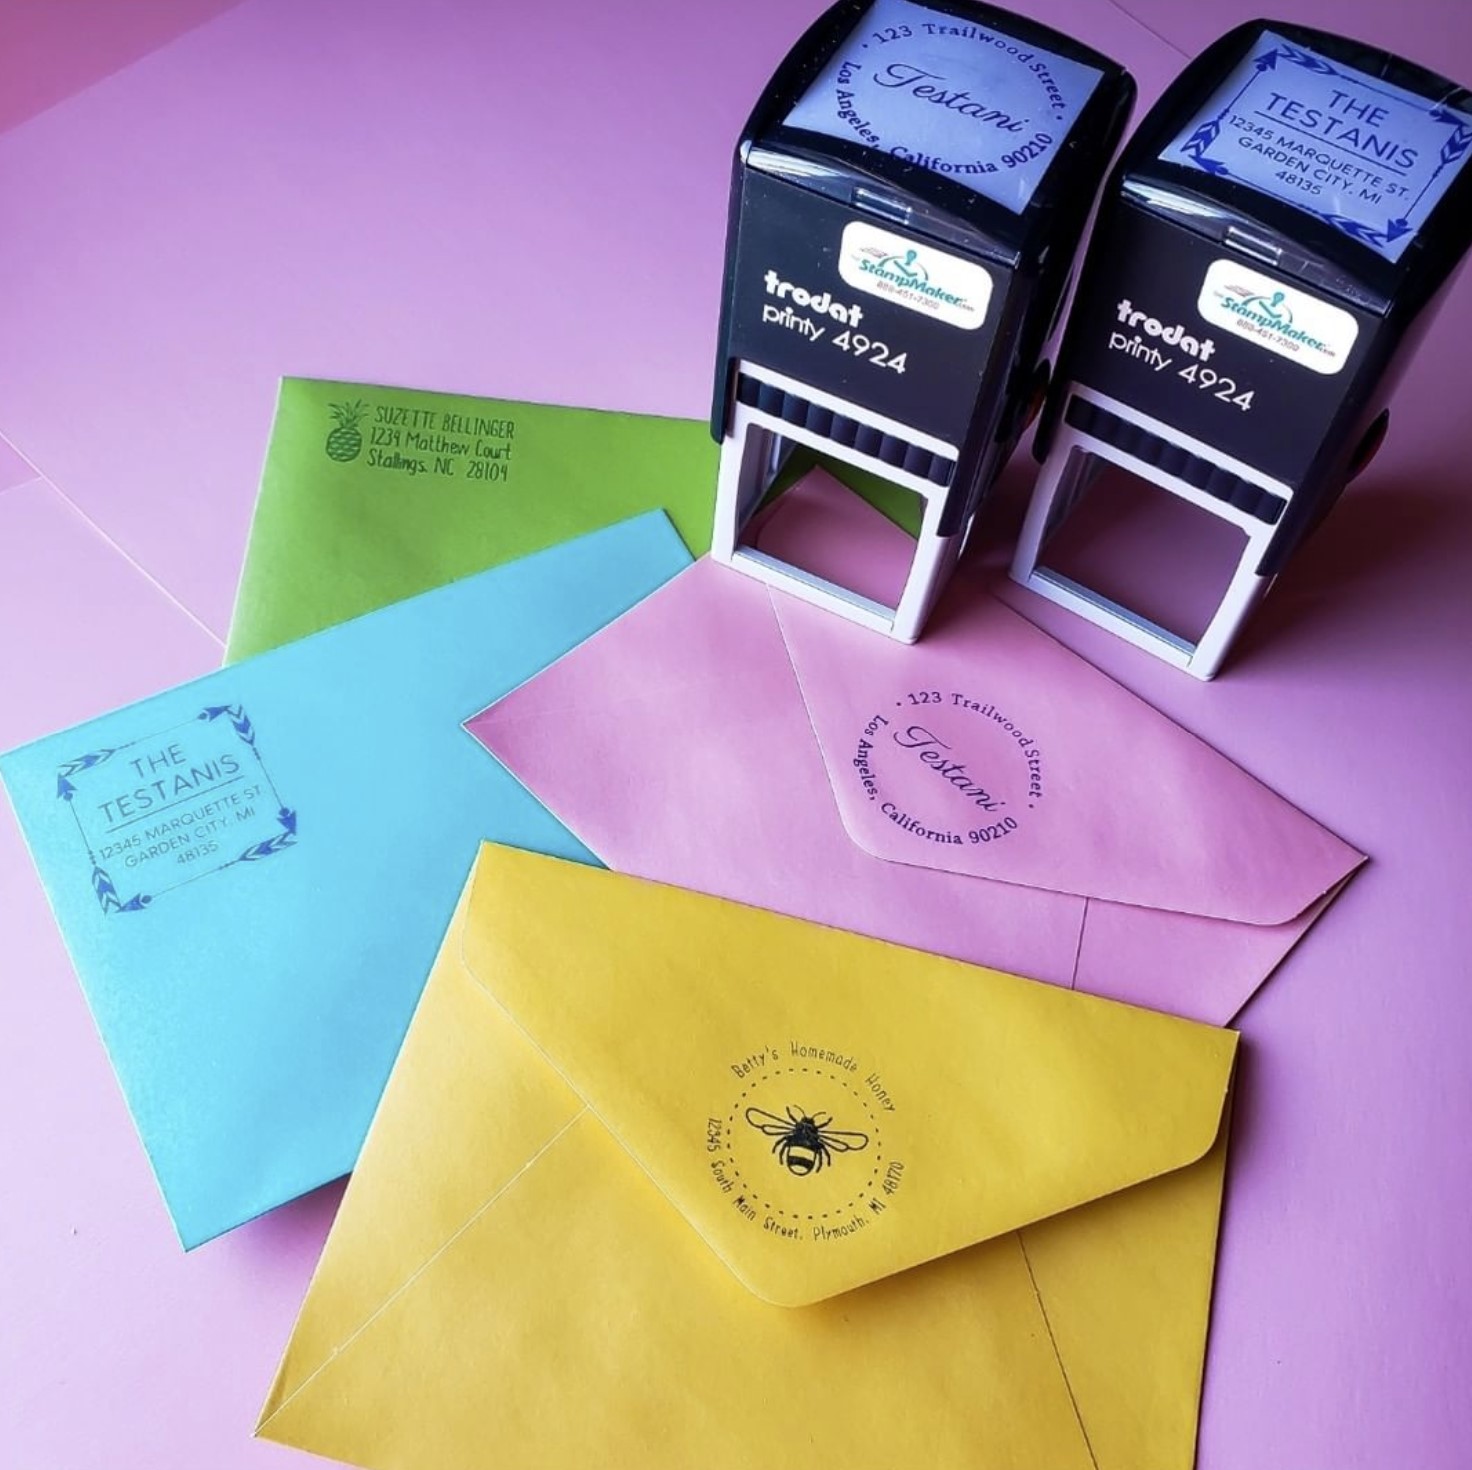
The same can be said for the return address, although you also have the option of using a custom return address stampto speed up the process. These return address stamps can be personalized according to your desired font, style, size, and spacing.
Mail Your Invitations!
A good rule of thumb is to send wedding invitations six to eight weeks before the wedding so your guests have time to make any arrangements (requesting off work, booking hotels, arranging childcare, etc.) and RSVP. However, destination weddings and other out-of-town events should give more notice.
Start Your DIY Project Today
Interested in trying DIY wedding invitations? Find options for easy-to-use (and simple to design) wedding stamps and personalized embossers here.