Using rubber stamps for card making allows you to create cards that feel personal without drawing every design or writing every message by hand. With the right stamp, ink, and paper, you can create everything from one-of-a-kind birthday cards to coordinated wedding thank-you notes.
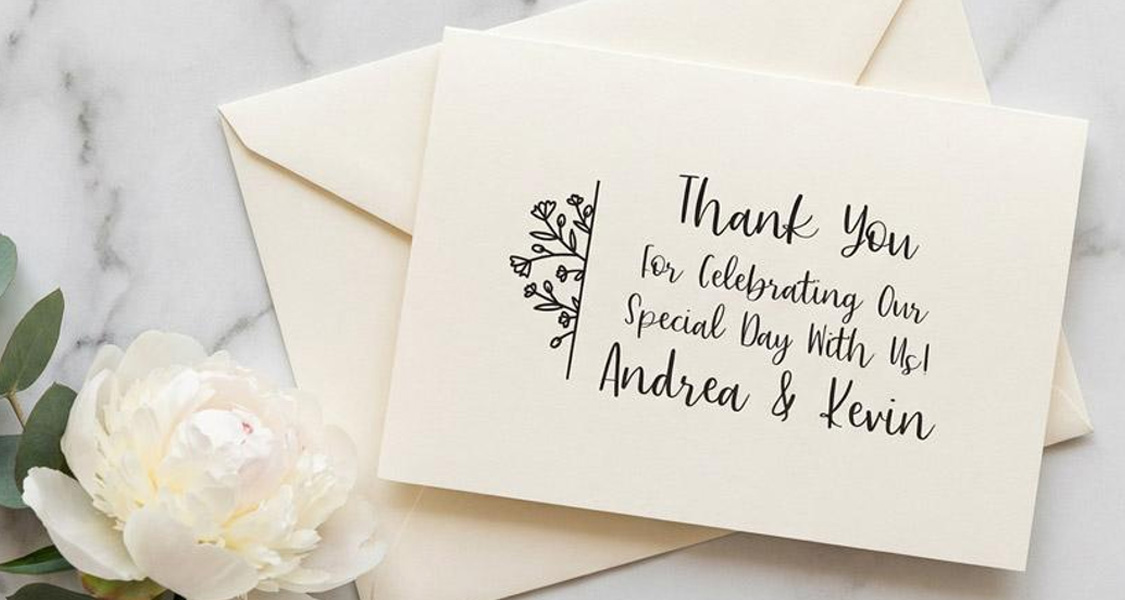
Stamps can add a greeting, create a repeating background, decorate an envelope, or apply a completely custom design. This guide explains which supplies you need, how to stamp a card, and how to choose stamps for different occasions.
Why use rubber stamps for card making?
A handmade card can feel more thoughtful than a store-bought option, but it does not need to take hours to create. Rubber stamps help you produce clean, repeatable designs while still choosing the colors, paper, layout, and finishing touches yourself.
Card makers use stamps to:
- Add greetings and short messages
- Create borders and repeating patterns
- Personalize cards with names, dates, or monograms
- Decorate envelopes to match the card
- Reproduce one design across invitations or thank-you notes
- Add illustrations without drawing each image by hand
Because rubber stamps can be reused, they are especially helpful when making several cards for the same occasion. Create a consistent design and personalize each card with handwritten notes or decorative details.
Stamping supplies for card making
You do not need a large collection of craft items to get started. A few basic supplies for card making will cover most beginner projects.
Rubber stamps
Choose stamps that fit the occasion and the available space on your card. Smaller images work well in corners, along borders, and on envelopes, while larger stamps can serve as the focal point on the card front.
Traditional wood-handle rubber stamps are easy to grip and position. You can also pair the same stamp with different ink colors to create a variety of styles.
Shop Rubber Stamps
Stamp pads and ink
Select an ink that works well with your paper. Before starting the final card, test the ink on a scrap of the same cardstock. This will show you how quickly it dries, whether it bleeds, and how the color appears.
Cardstock and scrap paper
Cardstock gives handmade cards more structure than standard paper. Smooth cardstock generally produces the clearest impression, especially for small lettering and fine details.
Keep scrap paper nearby to test placement, remove excess ink, and protect your work surface.
Optional decorations
Decorative details can help you build on the stamped image and give each card a more finished, personal look. Choose a few accents that support the design without making the card feel crowded. Once the ink is dry, finish the card with:
- Colored pencils or markers
- Patterned paper
- Stickers
- Ribbon or twine
- Adhesive gems
- Washi tape
These additions can help you create several styles with the same stamp.
Choosing the right rubber stamps for cards
The best stamp depends on what you are making, how many cards you need, and how much personalization you want. The StampMaker offers several home and hobby stamps that work well for card making.
Craft and seasonal stamps
Craft stamps can add illustrations, greetings, flourishes, and decorative details. Use one design as the centerpiece or combine smaller stamps to create a border or background.
Seasonal craft stamps are useful for Christmas, Valentine’s Day, Easter, Thanksgiving, graduation, and other annual celebrations. Reuse the same stamp each year while changing the paper, ink, or embellishments.
Wedding stamps
Wedding stamps can be used for save-the-dates, invitations, thank-you cards, favor tags, and envelopes. A personalized design might include the couple’s names, wedding date, initials, or a short message. Using the same stamp across several pieces helps keep the stationery coordinated.
Monogram and address stamps
A monogram can create a polished focal point on a card or envelope. It works especially well for wedding stationery, moving announcements, housewarming cards, and personalized note cards.
Address stamps are also useful when mailing a large batch of cards because they eliminate the need to handwrite the return address on every envelope.
Handmade-by stamps
A handmade-by stamp adds a finishing touch to the back of a card. It lets recipients know the card was created by hand and can include a name, shop name, or short message.
Shop Home & Hobby Rubber Stamps
Creating personalized rubber stamps for card making
Premade designs are convenient, but a custom stamp gives you more control over the finished card. With The StampMaker’s custom stamp designer, you can add text or upload your own artwork.
Personalized rubber stamps for card making can feature:
- A family name
- A couple’s names and wedding date
- A monogram
- A handwritten phrase
- An original illustration
- A business or maker logo
- A custom thank-you message
- A child’s drawing
For the clearest result, choose a design with defined lines and enough spacing between small details. Consider how the artwork and text will look at the final stamp size.
How to make a card with a rubber stamp
Once you have gathered your materials, follow these steps.
Step 1: Choose the card size
Decide whether you will use a premade blank card or cut your own cardstock. Make sure the stamp fits comfortably on the front panel without placing important details too close to the edges.
Step 2: Plan the layout
Place the uninked stamp over the card to estimate where the design should go. You can lightly mark the placement with a pencil or test the full arrangement on scrap paper. Leave enough room for any greetings, names, decorations, or handwritten messages.
Step 3: Test the stamp
Press the stamp lightly onto the ink pad until the raised design is evenly covered. Avoid pushing so hard that ink collects around the edges. Make a test impression on scrap paper and check the coverage, alignment, and pressure. The StampMaker also offers pre-inked and self-inking stamp options to simplify this step.
Step 4: Stamp the card
Place the card on a flat, stable surface. Lower the stamp straight onto the paper and apply firm, even pressure. Avoid rocking or sliding the stamp, which can blur the design. Lift it straight up when the impression is complete.
Step 5: Let the ink dry
Allow the stamped image to dry before coloring it or adding paper layers. Keeping your hands away from the fresh impression will help prevent smears.
Step 6: Add finishing details
Put the finishing touches on with color, ribbon, stickers, patterned paper, or another stamped element. You can also stamp the envelope flap or one lower corner to create a coordinated set. Finish with a handwritten message inside the card.
Rubber stamp card ideas for different occasions
One stamp can often be adapted for several occasions simply by changing the colors and wording.
- Birthday cards: Stamp a greeting in the center and surround it with stars, flowers, balloons, or a repeating pattern. A custom name stamp can make the design feel even more personal.
- Thank-you cards: Use a thank-you message as the main design, then add a border or small image. For weddings, showers, and parties, a custom stamp can include the hosts’ names or event details. The wedding thank-you example in the brief shows how personalized names, a short message, and decorative artwork can be combined into one reusable stamp.
- Wedding and anniversary cards: A monogram stamp can create an elegant card without requiring a complicated layout. Stamp it in the center and add a short greeting inside. The monogram example in the brief demonstrates how an initial, name, and address details can form a balanced circular design.
- Holiday cards: Stamp a seasonal image onto neutral cardstock, then add colored pencil, metallic accents, patterned paper, or ribbon.
- Cards from children: Turn a child’s drawing or handwritten message into a custom stamp. Children can then help choose the ink colors and decorate cards for relatives, teachers, or friends.
Easy card-making techniques to try
Once you are comfortable making a basic impression, you can start experimenting with simple techniques that add more depth, variety, and personality to your cards. Try these ideas:
- Create a repeating background: Stamp the same small image across the card front to create patterned paper.
- Build a border: Repeat a small stamp around the edge to frame the message.
- Layer multiple designs: Combine a large central image with smaller decorative stamps in another color.
- Use masking: Cover part of the card with removable tape or scrap paper to create a clean edge or blank section.
- Stamp matching envelopes: Repeat one small design from the card on the envelope flap or corner.
Test more complex layouts on scrap paper before using your final cardstock.
Tips for a clear stamp impression
A clean stamped image usually comes down to even ink coverage, steady pressure, and the right paper. Before working on your final card, make a practice impression to adjust your technique if needed.
- Work on a flat surface: An uneven table may keep parts of the stamp from touching the paper.
- Ink evenly: Cover the raised design without flooding the recessed areas.
- Use steady pressure: Press firmly without rocking the stamp.
- Lift straight up: Pulling the stamp away at an angle can smear the image.
- Choose smooth paper: Fine lettering usually appears more clearly on smooth cardstock.
- Let each layer dry: Allow one color to dry before adding another.
- Keep the stamp clean: Dried ink can reduce the clarity of future impressions.
- Clean the stamp after use: Remove ink before it dries in the design, following the cleaning directions for the ink you used.
A slightly imperfect impression can still suit the card's handmade style. Small variations are part of what makes each piece unique.
Make your next card more personal
Rubber stamps make card making more approachable, repeatable, and creative. Start with a simple greeting or decorative image, then experiment with custom layouts, coordinated envelopes, and different ink colors.
Explore The StampMaker’s home and hobby stamps for weddings, holidays, handmade projects, and everyday correspondence. For something entirely your own, use the custom stamp designer to add personalized text or upload an original image.