How to Choose the Right Embosser
Embossers are helpful tools. They generally consist of two different parts: a handle or press and a die insert. The die insert makes the actual impression and can be changed. This allows the user to have multiple different patterns.
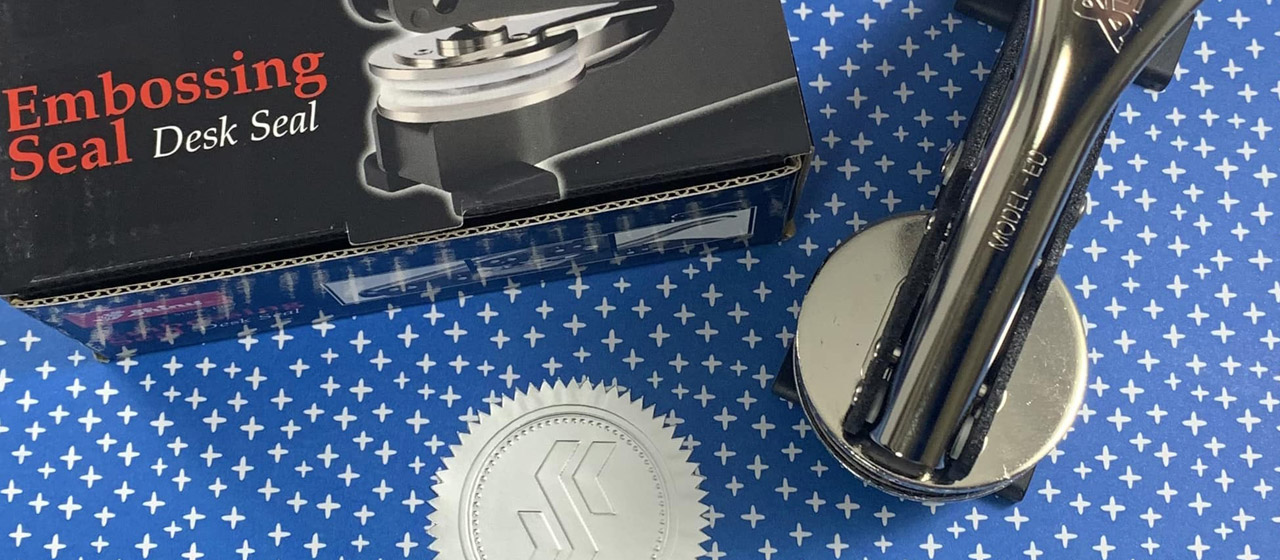
Embossers create raised impressions on paper. They are great for both aesthetic and security reasons.
If you don't know which seal embosser will be the best fit for you, you're in the right place. Before we help you decide on an embosser, though, let's talk about the different types of embossers.
What Are the Different Types of Embossers?
There are many different uses for embossers. For each use, there's a different embosser. Some common uses are book embossers, corporate seals, professional seals, and custom seals.
Corporate seals are created with a company’s logo to add authenticity to important documents.
Professional seals are a legal requirement for jobs like architecture, engineering, and notary work.
At The StampMaker, we offer several different types of embossers: desktop, pocket, long reach, gold, and chrome. Desktop embossers provide strong, consistent impressions. Pocket embossers allow you to carry your embosser with you with little hassle. Long reach embossers reach those places far back on a sheet of paper that you want to emboss. Gold and chrome embossers provide the perfect gift for someone starting a new job.
Finally, we offer custom embossers. With your personalized embosser, you can upload art or text and emboss whatever you want!
How to Choose the Right Embosser?
The first question you need to ask is what will you be embossing? As stated previously, there are several different types of embossers, and they each serve a different purpose. Once you’ve clarified what you will be embossing, ask yourself these three questions to find the best embosser.
Which Embosser Type Should You Choose?
Desktop Embossers: You should choose a desktop embosser if you’re looking for the strong consistency of something that sits on your desk.
Pocket Embosser: You should choose a pocket embosser if you need to make impressions on the go.
Long Reach Embosser: You should choose a long reach embosser if you have multiple types of documents you need to stamp.
Which Embosser Size Should You Choose?
There are two different measurements to keep in mind when considering an embosser: Embosser reach and embosser size. Embosser reach refers to the length an embosser has to imprint a page. Embosser size generally refers to the size of the die and, therefore, the impression made.
At StampMaker, we offer three embosser reaches and die sizes up to 1 ¾ inches in diameter. The reaches are different for our pocket, desktop, and long reach embossers. The latter extends 4¼ inches into paper. Which one you choose depends on how portable vs. how versatile you need your embosser to be.
What Paperweight Do You Normally Use?
Our embossers are made to emboss 20-pound paper. If you plan on embossing thinner or heavier paper, be sure to shop for embossers that support this. Embossing heavier paper with a normal embosser will not make a crisp impression. Embossing paper that is too thin will cut through the paper. For further information in choosing your paper, see our guide here.
How to Choose the Correct Embosser Orientation
Embosser orientation refers to the side of the page on which you will make the impression. You can get multiple dies if you want to make impressions at different orientations. The automatic option we provide is bottom orientation, as this is most common. You can also choose top, left, or right.
Top:
Top orientation means that you hold the embosser at the top of the page. These work well for imprints like addresses or logos at the top of letterheads.
Bottom:
Bottom orientation means that you hold the embosser at the bottom of the page. These work well for anything at the bottom of a page, like a logo or seal.
Right:
Right orientation means that you hold the embosser on the right side of the page. These can work well to create impressions on bound documents.
Left:
Left orientation means that you hold the embosser on the left side of the page. These work well for adding impressions to the lefthand side of single pages.
Conclusion
Now that you’ve chosen an embosser, there’s a couple more things to think about. First, do you want to use gold foil with your embosser? Second, do you know how to properly care for your embosser?
Simple steps, like holding the embosser properly and stamping one sheet at a time, will go miles towards the longevity of your new embosser. Our guide here will show you how to use these embossers properly. Finally, enjoy your new embosser.